
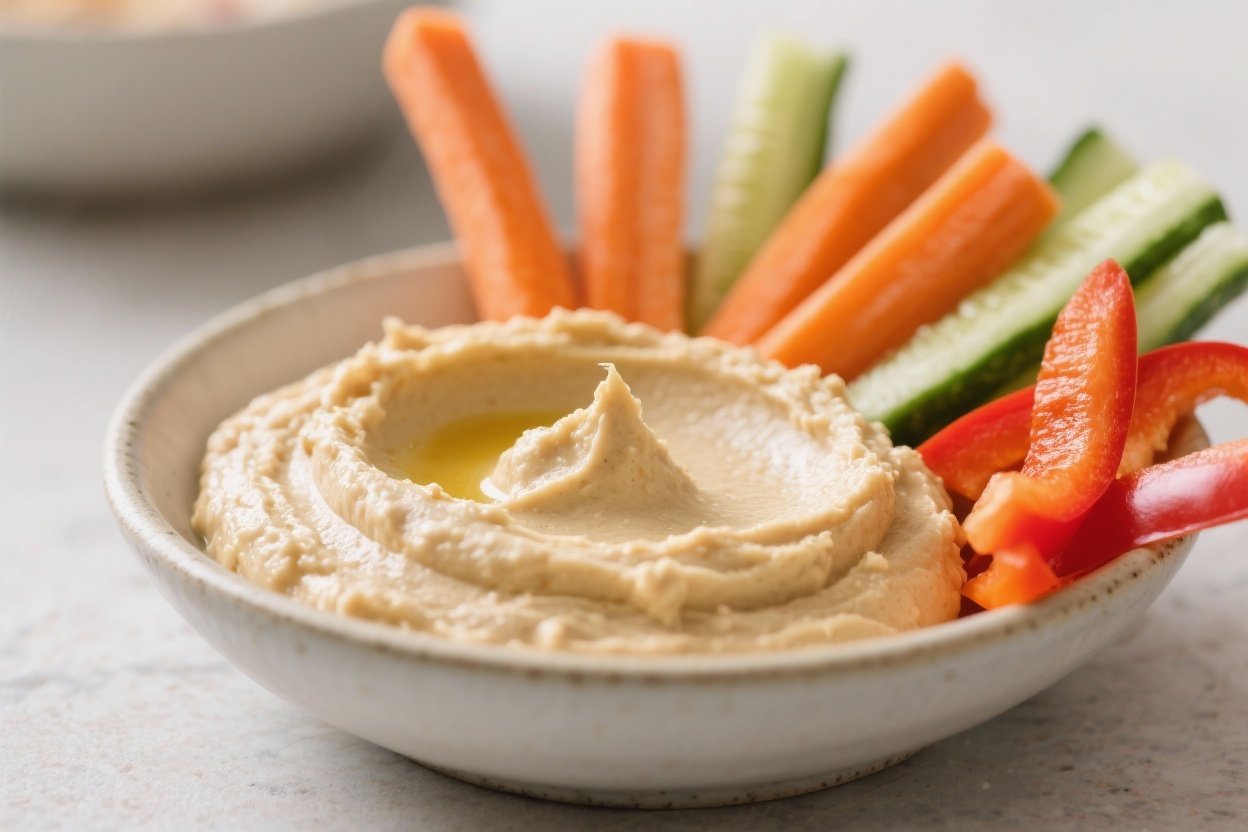
Like Store-Bought Dip, But Better – Homemade Hummus with Veggie Dippers: Creamy hummus made from scratch, perfect with carrot sticks, cucumber, or bell pepper strips — The Snack That Outsmarts the Aisle
You don’t need a fancy label or a $6 tub to upgrade snack time—you need a blender, a can of chickpeas, and four minutes of confidence. This hummus is ridiculously smooth, ultra-savory, and light-years better than the stuff that’s been sitting refrigerated since Tuesday. It’s the kind of snack that makes you feel like you’ve got your life together, even if your sink says otherwise.
Carrot sticks, cucumbers, bell peppers—this dip turns basic veggies into VIPs. Ready to make your future self proud (and your taste buds loud)?
Why You’ll Love This Recipe
- Silky, not gritty: Tricks like warm chickpeas and a tahini-first blend deliver restaurant-level creaminess.
- Budget-friendly: One batch costs less than store-bought and tastes fresher. Your wallet will cheer.
- Customizable: Lemon-forward?
Garlic-heavy? Chili-spiked? You call the shots.
- Meal-prep gold: Stays smooth for days and pairs with veggies, sandwiches, bowls—everything.
- Healthier snack: Fiber, protein, and healthy fats without mystery preservatives.
Shocking, I know.
Ingredients
- 1 can (15 oz) chickpeas, drained and rinsed (or 1.5 cups cooked)
- 1/4 teaspoon baking soda (for simmering the chickpeas, optional but recommended)
- 1/2 cup tahini (stirred until smooth)
- 3 tablespoons fresh lemon juice (about 1 large lemon), plus more to taste
- 1–2 cloves garlic, smashed
- 1/2 teaspoon fine sea salt, plus more to taste
- 1/2 teaspoon ground cumin (optional, but classic)
- 3–6 tablespoons ice-cold water, as needed
- 2–3 tablespoons extra-virgin olive oil, plus more for drizzling
- Veggie dippers: carrot sticks, cucumber rounds, bell pepper strips (any colors), celery sticks
- Optional toppers: paprika or Aleppo pepper, sesame seeds, chopped parsley, a few whole chickpeas
Let’s Get Cooking – Instructions
- Soften the chickpeas (optional but clutch): Add drained chickpeas to a small pot with enough water to cover and the baking soda. Simmer 10–15 minutes until very tender and skins loosen. Drain and rinse briefly with cool water.
- Make the tahini base: In a food processor, combine tahini, lemon juice, garlic, salt, and cumin.
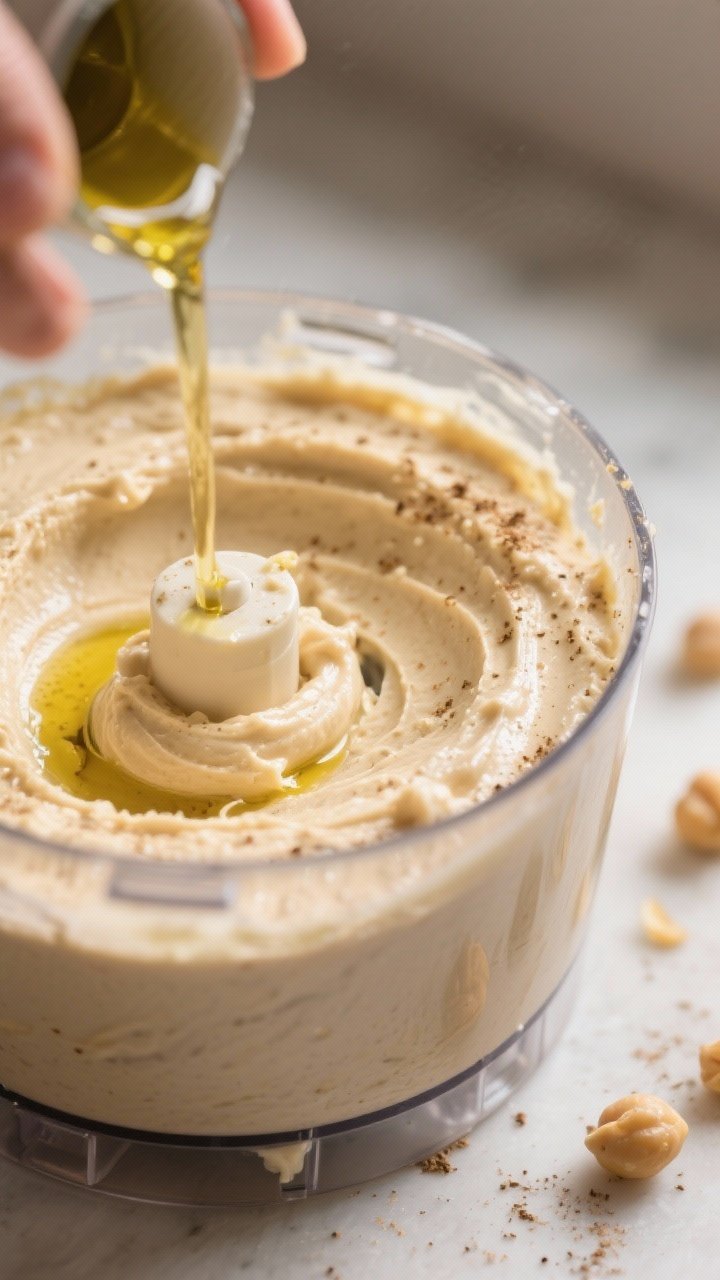
Process 30–45 seconds until thick and creamy. It may seize—that’s good.
- Add ice water: With the processor running, drizzle in 3–4 tablespoons ice-cold water. Blend until the tahini turns pale and fluffy.
Add another tablespoon if needed for a whipped texture.
- Blend in chickpeas: Add the warm chickpeas. Process 1 minute, scrape the sides, then process another 1–2 minutes until extremely smooth. Don’t be shy with the blend time.
- Finish with oil: With the machine running, stream in the olive oil.
Taste and adjust: more salt, more lemon, or a splash of water for silkiness.
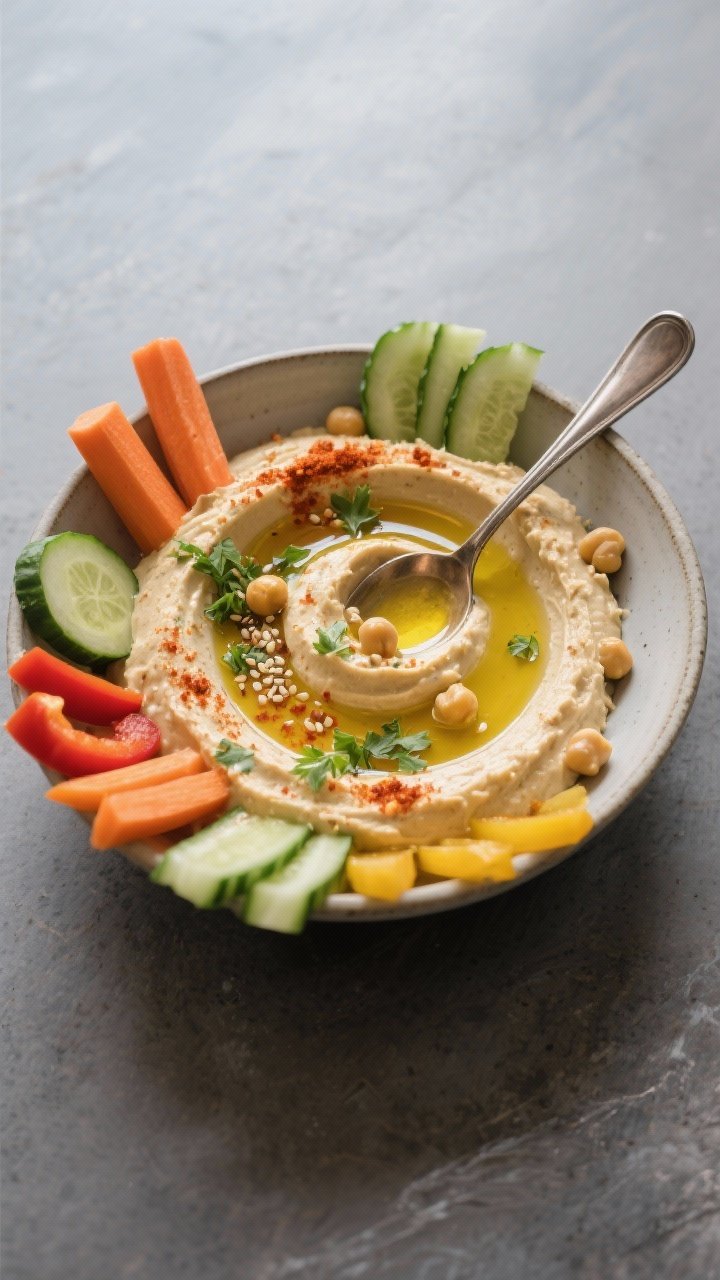
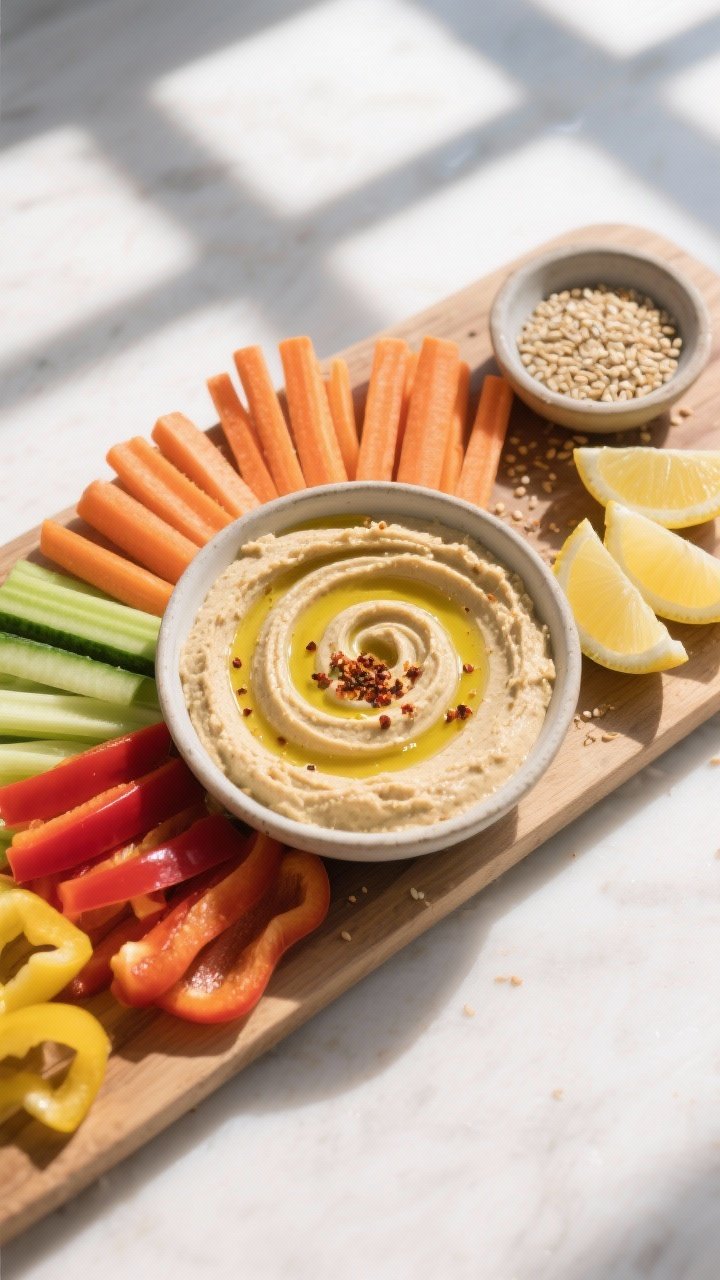
- Plate it like a pro: Spoon into a shallow bowl, create swooshes with the back of a spoon, drizzle with olive oil, and finish with paprika, sesame seeds, or parsley.
- Serve with veggie dippers: Carrot sticks, cucumber rounds, and bell pepper strips make a colorful, crunchy lineup. Add warm pita if you’re feeling extra.
Storage Tips
- Fridge: Store in an airtight container for 4–6 days. Press plastic wrap directly on the surface to prevent drying.
- Freezer: Yes, you can freeze hummus.
Portion into small containers; thaw overnight in the fridge, then stir in a teaspoon of water or lemon to revive the texture.
- Stir before serving: Hummus thickens in the fridge. A splash of water or lemon plus a quick stir brings it back.
Nutritional Perks
- Plant protein: Chickpeas deliver a satisfying protein boost to keep hunger in check.
- Healthy fats: Tahini and olive oil offer heart-friendly unsaturated fats.
- Fiber-rich: Supports digestion and steady energy—no sugar crash required.
- Micronutrients: Iron, magnesium, zinc, and B vitamins show up like a wellness squad.
- Veggie synergy: Pairing with carrots, cucumbers, and peppers adds hydration, crunch, and vitamins A and C. FYI: color on your plate isn’t just pretty—it’s functional.
Don’t Make These Errors
- Skipping the tahini whip: If you toss everything in at once, you’ll miss that cloud-like texture.
Whip tahini with lemon and water first.
- Using room-temp water: Ice-cold water helps emulsify and lighten the hummus. Warm water equals meh texture.
- Under-blending: A quick blitz won’t cut it. Process for several minutes for ultra-smooth results.
- Skimping on salt and acid: Bland hummus is a crime.
Season to the point where the flavors pop.
- Old tahini: Rancid or separated tahini will ruin the batch. Use fresh, well-stirred tahini. This matters more than you think.
Different Ways to Make This
- Roasted garlic hummus: Swap raw garlic for 2–3 cloves of roasted garlic for mellow sweetness.
- Spicy harissa or chili hummus: Blend in 1–2 teaspoons harissa paste or chili crisp for heat and depth.
- Herby green hummus: Add a handful of parsley or cilantro and a squeeze of extra lemon for a fresh, bright version.
- Smoky paprika: Stir in 1/2 teaspoon smoked paprika; top with more and a drizzle of oil.
Instant mezze vibes.
- Greek yogurt swirl: For extra protein and tang, fold in 2–3 tablespoons plain Greek yogurt. Not traditional, but tasty, IMO.
- Bean switch: Try half chickpeas, half white beans for an even silkier texture.
FAQ
Do I need to peel the chickpeas?
Peeling gives ultra-smooth hummus, but it’s tedious. Simmering with baking soda loosens skins and gets you 95% of the way there with way less effort.
Can I make hummus without tahini?
Yes.
Replace tahini with 2–3 tablespoons olive oil and a spoonful of plain yogurt or almond butter. The flavor shifts slightly, but it’s still creamy and satisfying.
Which is better: canned or cooked-from-dry chickpeas?
Canned is convenient and great. Cooked-from-dry (with a pinch of baking soda) can be even creamier.
If you have time, soak overnight and simmer until very soft.
Why is my hummus thick or pasty?
It likely needs more liquid or fat. Add ice water by the tablespoon and a bit more olive oil, then blend longer. Also check salt and lemon—under-seasoning can make it taste dull and heavy.
How do I get that restaurant-style swirl?
Spread hummus in a shallow bowl, drag the back of a spoon in circular patterns to create valleys, then finish with olive oil and a sprinkle of paprika or sesame.
Easy flex, big payoff.
Is this hummus gluten-free and vegan?
Yes to both. Just verify your tahini is pure sesame and your add-ins are gluten-free. Serve with veggies or gluten-free crackers for a 100% GF snack.
Can I use a blender instead of a food processor?
A high-speed blender works, but you may need to add a touch more water and stop to scrape often.
Start slow so you don’t overheat the motor—no one wants warm hummus, unless it’s on purpose.
In Conclusion
Homemade hummus is the low-effort, high-reward snack that makes store-bought look sleepy. With a handful of pantry staples and a couple of pro tips—tahini whip, ice water, proper blending—you’ll get a creamy, bright, and intensely craveable dip every time. Load up a plate with carrot sticks, cucumber rounds, and bell pepper strips, and you’ve got a snack that’s both weekday-fast and dinner-party-worthy.
Keep a batch in the fridge and watch your “I’m starving” moments turn into “I’ve got this” wins.
Printable Recipe Card
Want just the essential recipe details without scrolling through the article? Get our printable recipe card with just the ingredients and instructions.


One Comment