Like Pizza Lunchables, But Better – DIY Pizza Lunchables (Customizable & Cheaper!): Whole-Wheat Crackers, Sauce, Cheese, and Toppings That Make Lunch Fun Again
October 23, 2025 · 8 min read
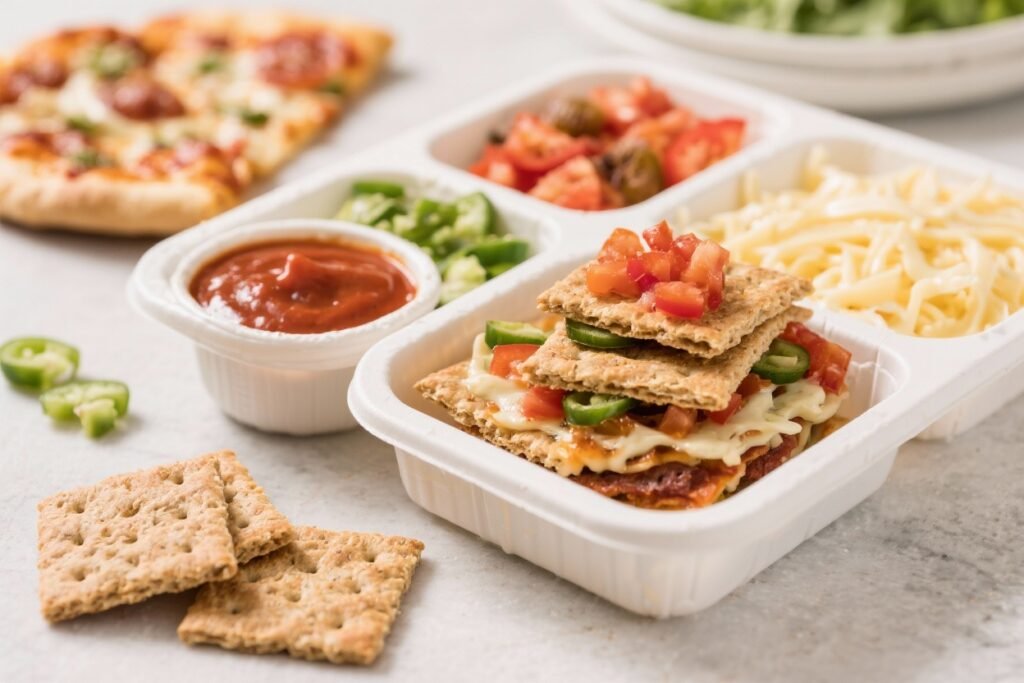
Skip the overpriced plastic tray and make a lunch that actually slaps. We’re talking crunchy whole-wheat crackers, punchy pizza sauce, melty cheese, and toppings you actually like. It’s cheaper, cleaner, customizable, and your inner child will high-five you.
Make a week’s worth in 15 minutes and watch lunches stop coming home half-eaten. Ready to give store-bought a glow-down? If your crew goes for these, you’ll also want to check out our pizza muffins—same energy, different format.
DIY Pizza Lunchables
Ingredients
Method
- Choose durable, whole-wheat or multigrain crackers. Avoid flimsy ones that surrender under sauce.
- Scoop 2–4 tablespoons into a small lidded cup per lunch. Thicker sauce prevents soggy crackers.
- Shred mozzarella or cube it. Add 1 tablespoon grated Parmesan for extra flavor. Aim for 1/3–1/2 cup cheese per serving.
- Slice or cube. If using sausage or mushrooms, cook and cool them first to avoid oily leaks.
- Pat olives, tomatoes, or pineapple dry with paper towels so they don't waterlog your box.
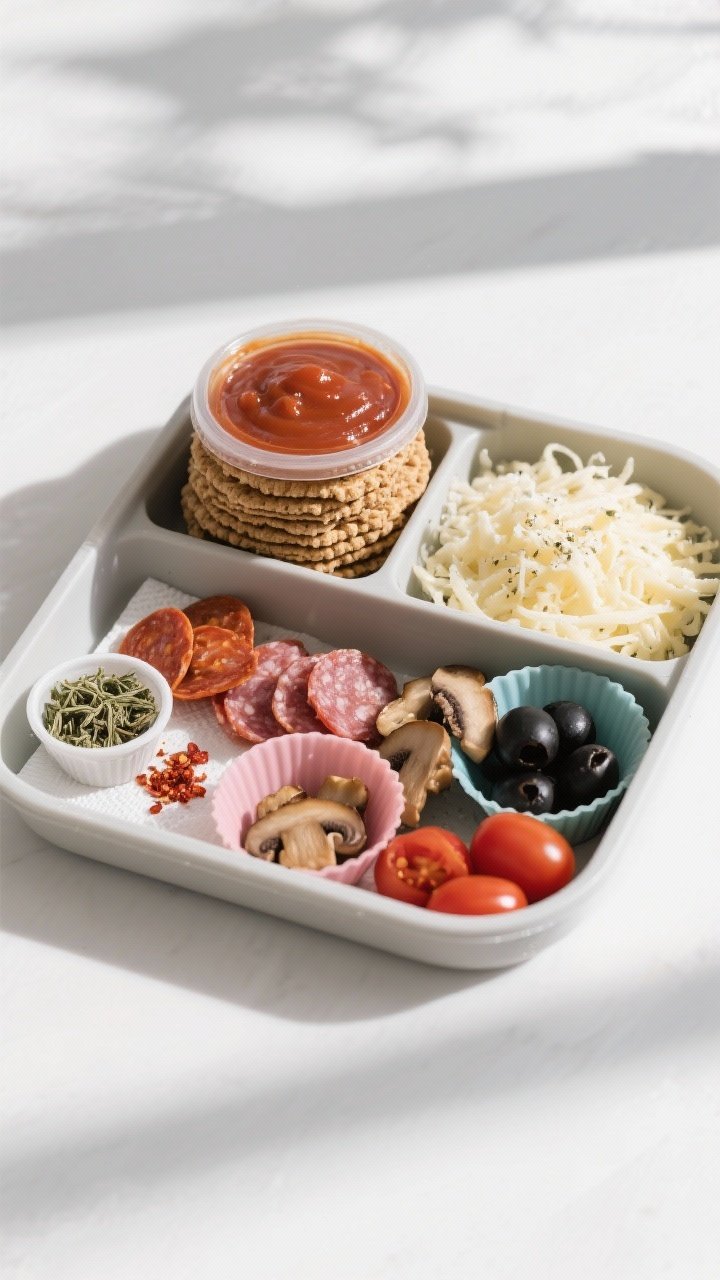
- In a divided container, add a stack of crackers, a sauce cup, cheese, and toppings. Keep crackers separate from moist items.
- Pack a pinch of dried oregano, red pepper flakes, or a tiny pesto container. It's the 10/10 upgrade.
- If traveling, place crackers in a baggie or separate compartment to preserve crunch.
- Spread a little sauce on a cracker, add cheese and toppings, finish with herbs. Repeat until lunch envy sets in around you.
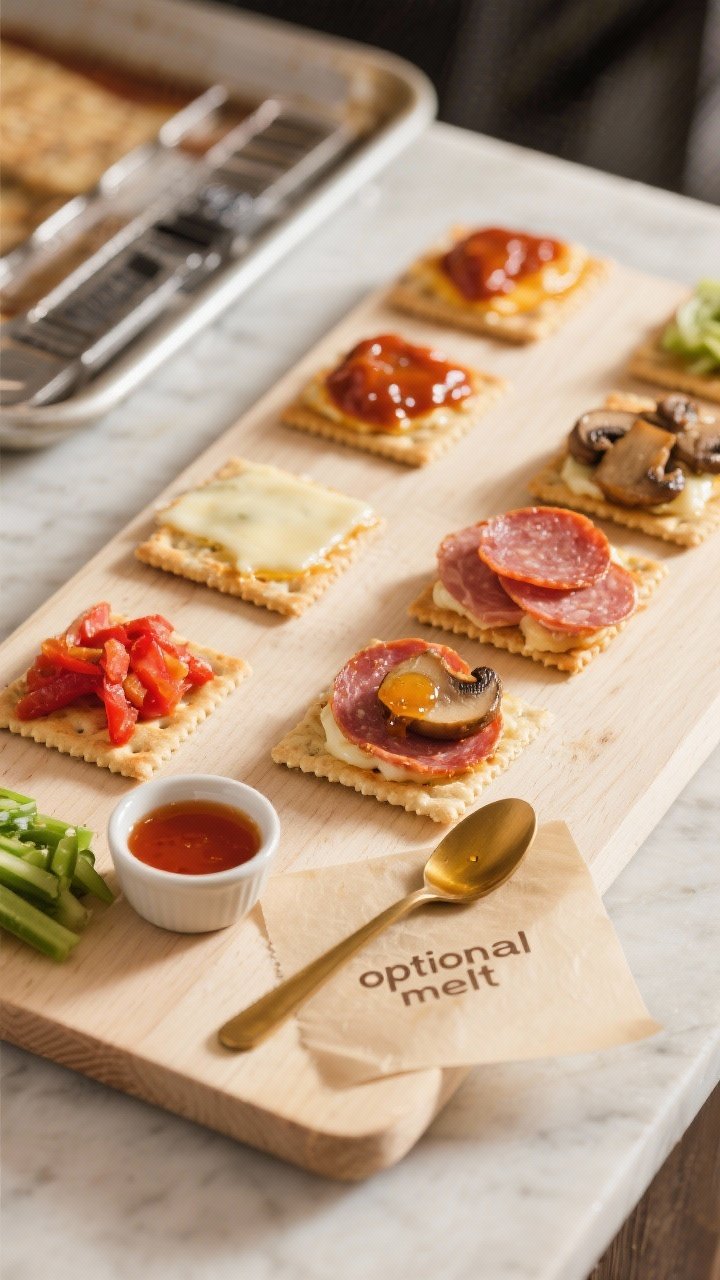
- If you have a toaster oven or microwave at work, assemble on a cracker and heat briefly. Use parchment to avoid a mess.
Why Make DIY Pizza Lunchables?
Because spending less on lunches shouldn’t mean settling for less—you get better ingredients, way more fun, and zero mystery-meat coins in the deal.
- Cheaper than store-bought: Build 5–6 lunches for the cost of one name-brand pack.
- Customizable: Gluten-free? Dairy-free?
Picky-eater? No problem—swap everything.
- Nutritious upgrade: Whole grains, real cheese, and better sauce equals better energy and fewer crashes. The CDC’s kids’ nutrition guide confirms that packing real whole grains and protein helps sustain energy through the school day.
- Zero reheating: It’s a cold “build-your-own” situation. Think charcuterie board meets pizza party.
- Kid-approved, adult-friendly: Great for kids, teens, and desk lunches that don’t scream sad.
What Do You Need?
Seven-ish ingredients, all recognizable, all doing real work—sturdy crackers for crunch, thick sauce for flavor, and toppings that make every bite feel like a party.
- Whole-wheat crackers (sturdy ones like Triscuits, woven wheat, or thick multigrain)—you want crunch and structure.
- Pizza sauce—store-bought or homemade.
Marinara works in a pinch; thicker is better for less sogginess. Watch out for added sugar—many brands sneak in more than you’d think, per the American Heart Association’s sugar guidelines.
- Cheese—shredded low-moisture mozzarella is classic. Add Parmesan for salty punch. String cheese coins work for fun factor.
- Protein toppings—mini pepperoni, turkey pepperoni, diced salami, cooked sausage crumbles, rotisserie chicken, or chickpeas.
- Veggies—mini bell peppers, black olives, cherry tomatoes (de-seeded), baby spinach, mushrooms (pre-sautéed), corn, or pineapple (yes, team pineapple is welcome).
- Extras—fresh basil ribbons, red pepper flakes, dried oregano, garlic powder, or Italian seasoning.
- Dippers—a small container for sauce; optional ranch, pesto, or hot honey for flair.
- Optional sweet bite—grapes, apple slices, or a square of dark chocolate to round it out.
How Do You Make Them?
Prep toppings, portion sauce, stack crackers, and pack—ten minutes of assembly and you’ve just solved lunch for the entire week.
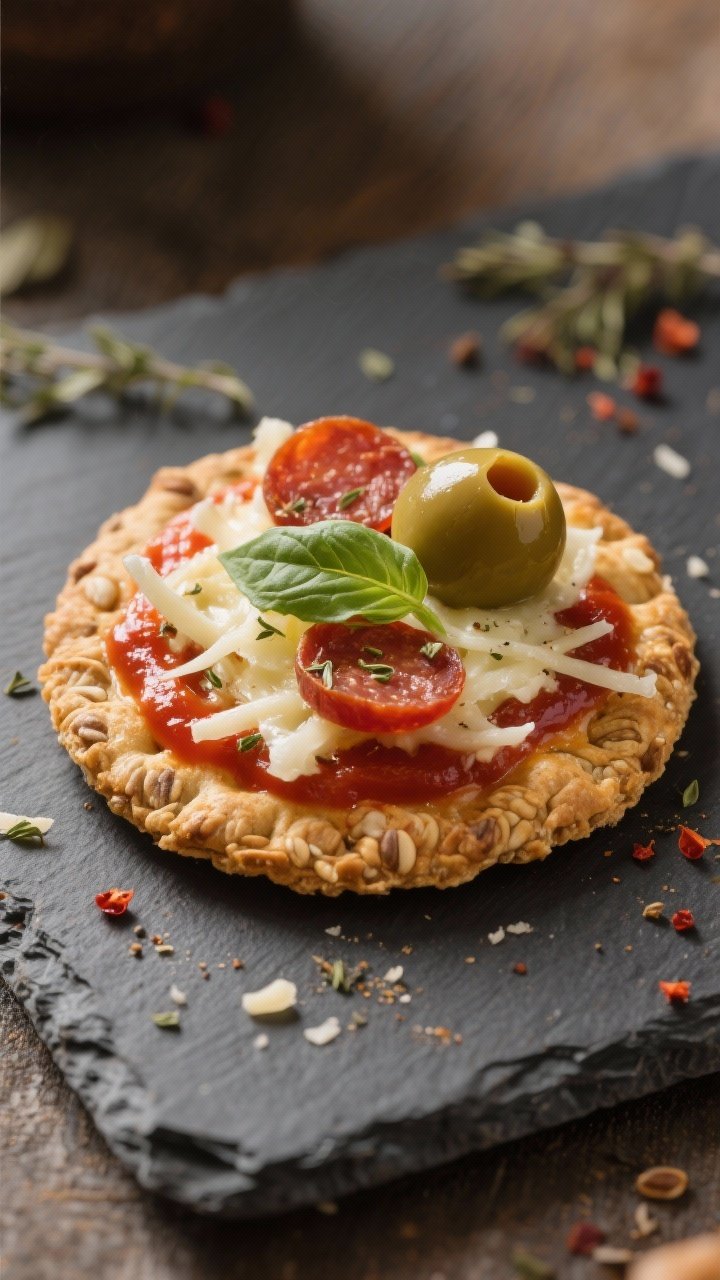
- Pick your base: Choose durable, whole-wheat or multigrain crackers.
Avoid flimsy ones that surrender under sauce.
- Portion the sauce: Scoop 2–4 tablespoons into a small lidded cup per lunch. Thicker sauce prevents soggy crackers.
- Prep the cheese: Shred mozzarella or cube it. Add 1 tablespoon grated Parmesan for extra flavor.
Aim for 1/3–1/2 cup cheese per serving.
- Prepare proteins: Slice or cube. If using sausage or mushrooms, cook and cool them first to avoid oily leaks.
- Dry the wet stuff: Pat olives, tomatoes, or pineapple dry with paper towels so they don’t waterlog your box.
- Assemble the lunch kit: In a divided container, add a stack of crackers, a sauce cup, cheese, and toppings. Keep crackers separate from moist items.
- Flavor boost: Pack a pinch of dried oregano, red pepper flakes, or a tiny pesto container.
It’s the 10/10 upgrade.
- Pack smart: If traveling, place crackers in a baggie or separate compartment to preserve crunch.
- To eat: Spread a little sauce on a cracker, add cheese and toppings, finish with herbs. Repeat until lunch envy sets in around you.
- Optional “melt” hack: If you have a toaster oven or microwave at work, assemble on a cracker and heat briefly. Use parchment to avoid a mess.
How Do You Store and Pack Them?
Keep components separate and moisture under control—that’s the whole game. Crackers stay crunchy, toppings stay fresh, and nobody opens a sad lunchbox.
- Refrigeration: Keep prepped kits in the fridge for 3–4 days.
Store crackers separately at room temp.
- Freezing: Not ideal for assembled kits. You can freeze cooked sausage, pepperoni, or sauce in small portions. Thaw overnight.
- Moisture control: Use paper towels under juicy toppings (tomatoes, pineapple) to absorb extra liquid.
- Travel: Keep sauce in a leak-proof container.
For school lunches, add an ice pack to keep proteins safe. The ChooseMyPlate meal planning guide has more batch-prep strategies that save time all week.
What Makes This Better Than Store-Bought?
You control every ingredient, every topping, and every dollar—plus the build-your-own factor turns “meh lunch” into an actual activity kids look forward to.
- Real ingredients without the mystery. You control sodium, sugar, and additives.
- Budget-friendly: One bottle of sauce + a block of cheese + a box of crackers = multiple lunches.
- Fun factor: Build-your-own makes even picky eaters curious. It’s lunch as an activity.
- Macro-friendly: Easy to balance protein, carbs, and fat.
Add extra protein for athletes or teens with bottomless stomachs. The USDA snack guidelines have good frameworks for building balanced kid-sized meals.
What Should You Watch Out For?
These lunch kits are almost foolproof, but a few common mistakes—soggy crackers, bland sauce, overloaded boxes—can turn a win into a WTF.
- Soggy crackers: Keep sauce separate and choose a thicker, not watery, sauce. Pat toppings dry.
- Flimsy crackers: Some crackers snap under toppings. Pick sturdy ones; test a few brands.
- Cheese moisture: Fresh mozzarella is delicious but wet—use low-moisture mozz for best texture.
- Overpacking: Too many toppings in one compartment equals moisture build-up.
Use dividers or silicone cups.
- Bland sauce: If it tastes flat, add a pinch of salt, oregano, and a drizzle of olive oil. Problem solved.
What Variations Work?
Go gluten-free, go fancy, go kid-core—the format bends to whatever your crew needs this week without breaking a sweat.
- Gluten-free: Use GF crackers or mini rice cakes. Choose a thick sauce so it doesn’t soak in immediately.
- Dairy-free: Use plant-based mozzarella shreds and add extra salty elements like olives or sun-dried tomatoes for flavor.
- High-protein: Add turkey pepperoni, cottage cheese cups, or grilled chicken cubes.
Consider higher-protein crackers.
- Veggie-forward: Load up with roasted peppers, artichokes, olives, spinach, and mushrooms. Add basil for freshness.
- Fancy version: Swap pizza sauce for pesto, add fresh mozzarella pearls, cherry tomatoes, and balsamic glaze. Office flex.
- Kid-core: Mini pepperoni, string cheese coins, and star-cut bell peppers.
Include a sticker. Yes, it helps.
Store-Bought vs. DIY Pizza Lunchables
Here’s the receipts—how the name-brand lunchbox stacks up against your homemade version, category by category.
| Category | Store-Bought Lunchable | Your DIY Version |
|---|---|---|
| Cost per lunch | $3–$5 | $0.75–$1.50 |
| Crackers | Refined white flour | Whole-wheat or multigrain |
| Cheese | Processed cheese product | Real shredded mozzarella |
| Toppings | Mini pepperoni (limited) | Unlimited—veggies, proteins, herbs |
| Customizability | None | Total—GF, dairy-free, whatever |
| Fun Factor | Low (same every time) | High (build-your-own activity) |
Common Questions
From cracker crunch to school-lunch safety—here’s what everyone asks first.
Can I use tortillas or pitas instead of crackers?
Yes—cut whole-wheat tortillas or mini pitas into small rounds for a softer base. Toast lightly if you want a sturdier bite.
How do I keep this safe for school without a fridge?
Use an insulated lunch bag with an ice pack to keep sauce and proteins chilled. Crackers can stay at room temperature without any issues.
Can I make these the night before?
Absolutely—pack components separately, keep crackers dry, and you’re good. Add a paper towel under juicy toppings for extra insurance.
Can I make a big batch for the week?
Yes—prep toppings and cheese in airtight containers, portion sauce into mini cups, and keep crackers separate. Assemble daily in under a minute.
How much should I pack per lunch?
Plan on 10–14 crackers, 1/4–1/3 cup sauce, 1/3–1/2 cup cheese, and 1/4–1/2 cup mixed toppings depending on age and appetite. It’s a snack-style build, so adjust based on what else is in the lunchbox.
What if my kid hates sauce?
Skip it and pack ranch, pesto, or hummus instead. It’s still a DIY “pizza-ish” lunch—no one’s calling the pizza police.
What’s a good vegetarian protein to add?
Marinated tofu cubes, roasted chickpeas, or white beans all work great. Add olives and Parmesan for extra flavor punch.
The Bottom Line
This DIY kit beats store-bought on cost, taste, and fun, and it takes almost no time. You get maximum crunch, real ingredients, and the exact toppings you love—no mystery meat coins required.
Prep a few at once and you’ve solved lunch for days. Pair these with our butternut squash mac for dinner, pack leftovers for tomorrow’s lunch, and maybe throw in some homemade cereal bars for dessert. Consider this your green light to bring back pizza day, any day.
Printable Recipe Card
Want just the essential recipe details without scrolling through the article? Get our printable recipe card with just the ingredients and instructions.