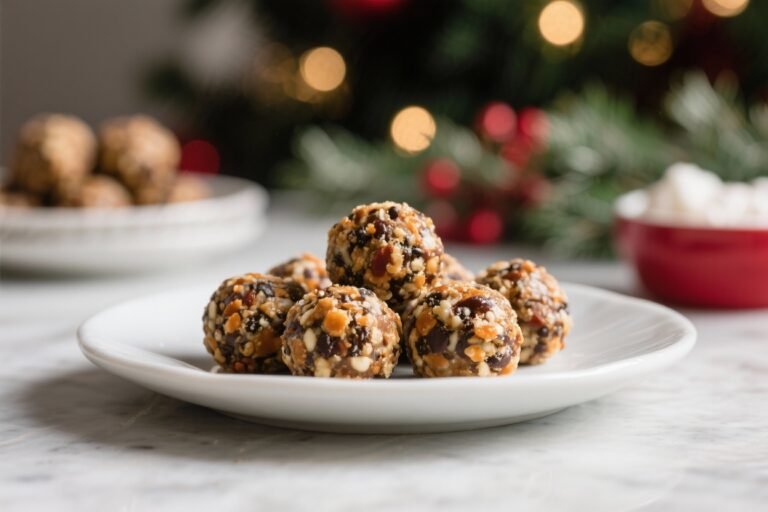
Mess-Free Energy Bites (No Rolling Required): The Snack Hack You’ll Brag About
You’re busy, hungry, and absolutely not washing another sticky bowl. Good news: these Mess-Free Energy Bites (No Rolling Required) are everything you want from a quick snack—fast, clean, and actually delicious. No sticky palms, no crumb explosions, no Pinterest-fail energy ball rolling.
You press, chill, slice, and flex like a meal-prep wizard. It’s the snack equivalent of finding cash in an old jacket: zero effort, big payoff.
Why You’ll Love This Recipe
- No rolling, ever. Press the mixture into a pan, chill, and slice—your countertops stay neat and your hands stay clean.
- Fast and flexible. All pantry staples. Swap ingredients to fit vegan, gluten-free, or dairy-free needs.
- Balanced fuel. Carbs for energy, protein for staying power, healthy fats for brain fuel.
Your 3 p.m. slump just lost.
- Kid-friendly and office-safe. Easy to make nut-free if needed. No crumbs, no meltdowns, no weird smells.
- Budget-friendly. Cheaper than store-bought bars, with better texture and no mystery ingredients.
Shopping List – Ingredients
- Rolled oats – 2 1/2 cups (use certified gluten-free if needed)
- Nut or seed butter – 3/4 cup (peanut, almond, cashew, or sunflower seed for nut-free)
- Honey or maple syrup – 1/2 cup
- Chia seeds – 2 tablespoons (for fiber and binding)
- Ground flaxseed – 2 tablespoons (adds omega-3s and structure)
- Protein powder (optional) – 1/2 cup (vanilla or unflavored)
- Mini chocolate chips or chopped dark chocolate – 1/2 cup
- Vanilla extract – 1 teaspoon
- Fine sea salt – 1/4 teaspoon
- Milk of choice – 2–4 tablespoons (dairy or non-dairy, to adjust consistency)
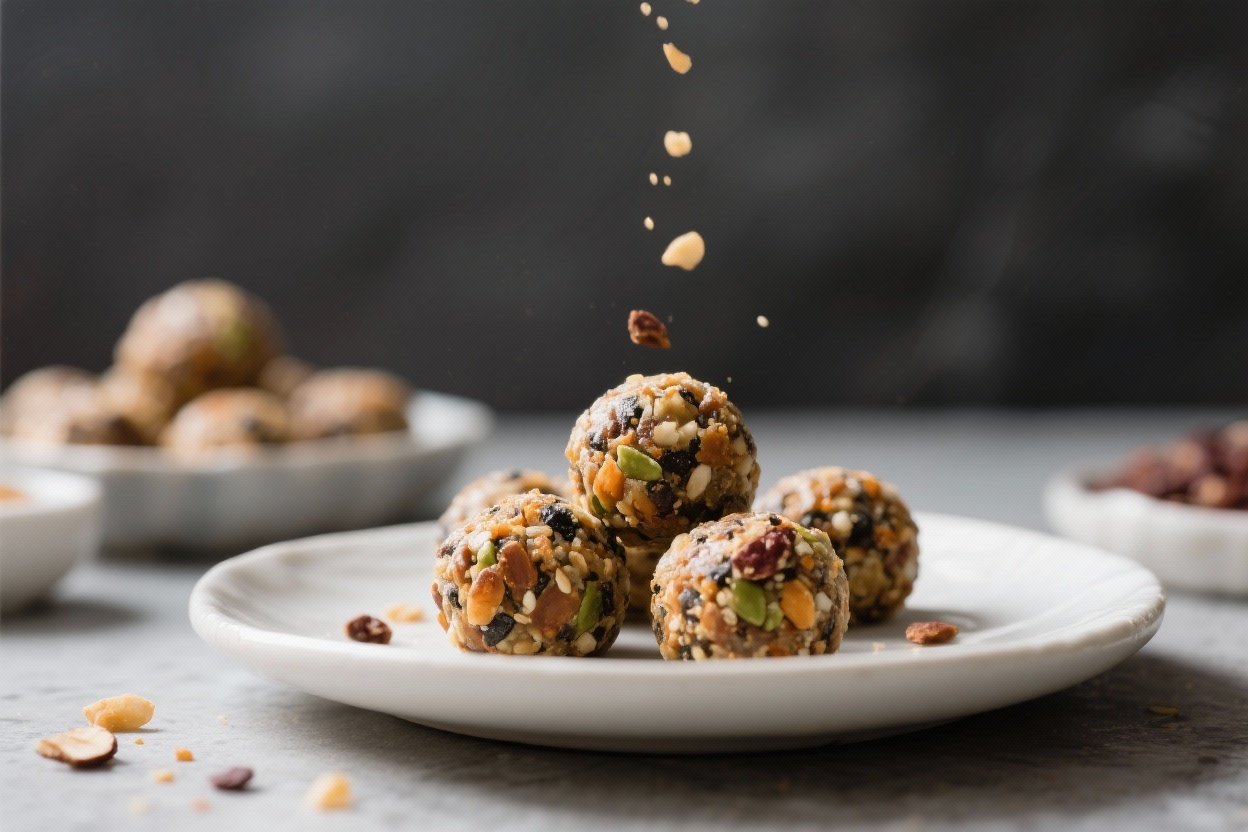
- Optional mix-ins – 1/2 cup total: shredded coconut, dried cranberries, chopped nuts, pumpkin seeds
Step-by-Step Instructions
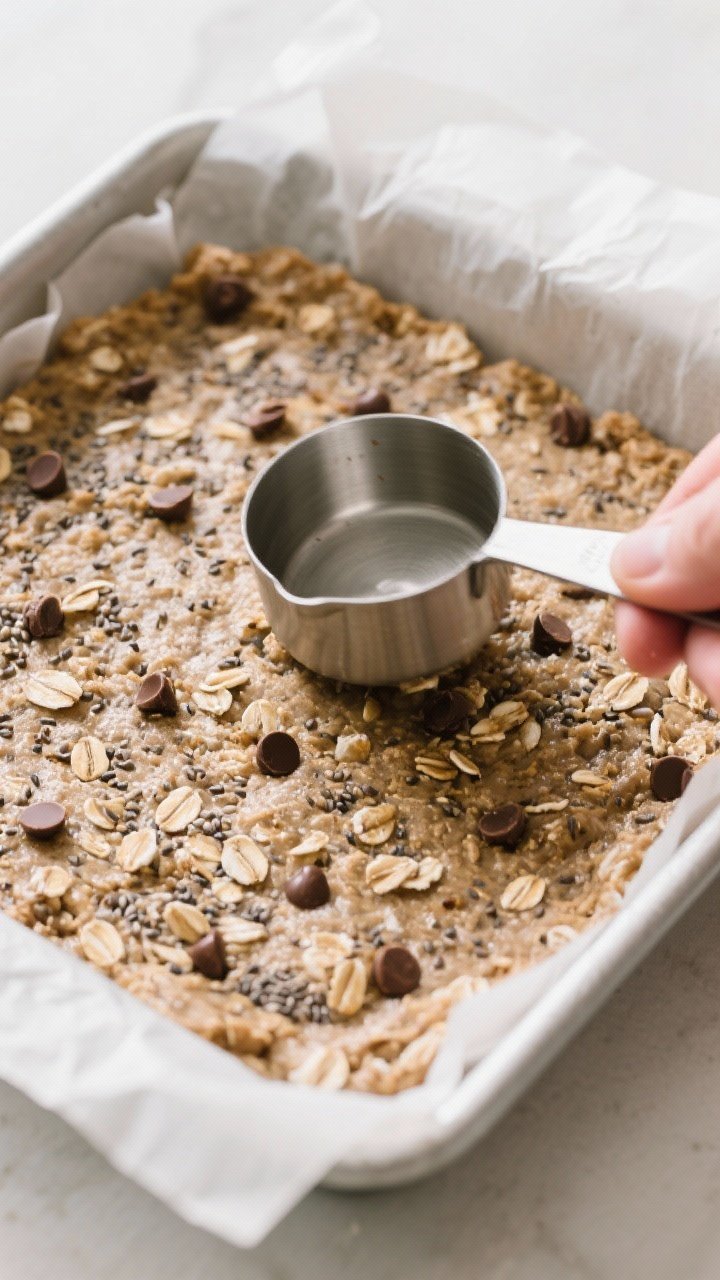
- Line your pan. Use an 8×8-inch square pan. Line with parchment, leaving overhang on two sides for easy lifting.
This is your “no-mess insurance.”
- Mix the wet base. In a large bowl, stir nut/seed butter, honey or maple, vanilla, and salt until smooth. If your nut butter is firm, microwave it for 15–20 seconds to loosen up.
- Add the dry team. Add oats, chia seeds, ground flax, and protein powder (if using). Stir with a sturdy spatula.
It’ll look crumbly—normal.
- Adjust texture. Add 2 tablespoons milk and fold. If the mixture doesn’t hold together when pressed, add up to 2 more tablespoons, 1 at a time. You want “sticky granola bar” vibes, not wet cement.
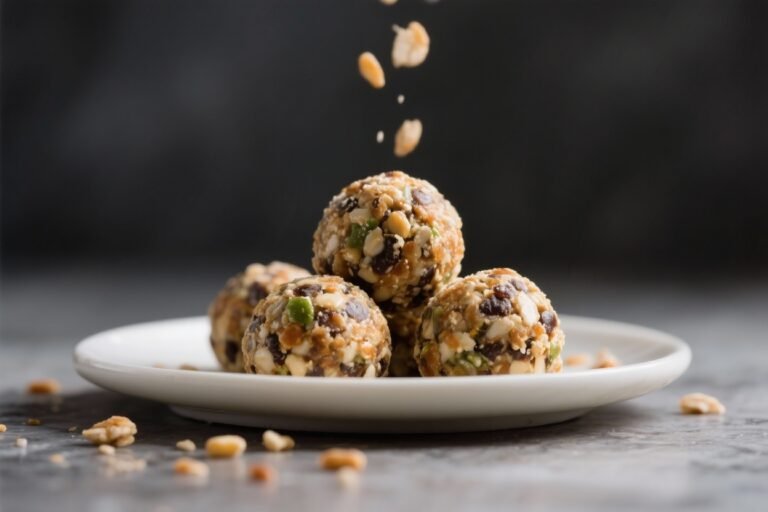
- Fold in the fun. Stir in chocolate chips and any optional mix-ins.
If your mixture is warm, chill it for 5 minutes first so the chocolate doesn’t melt and streak.
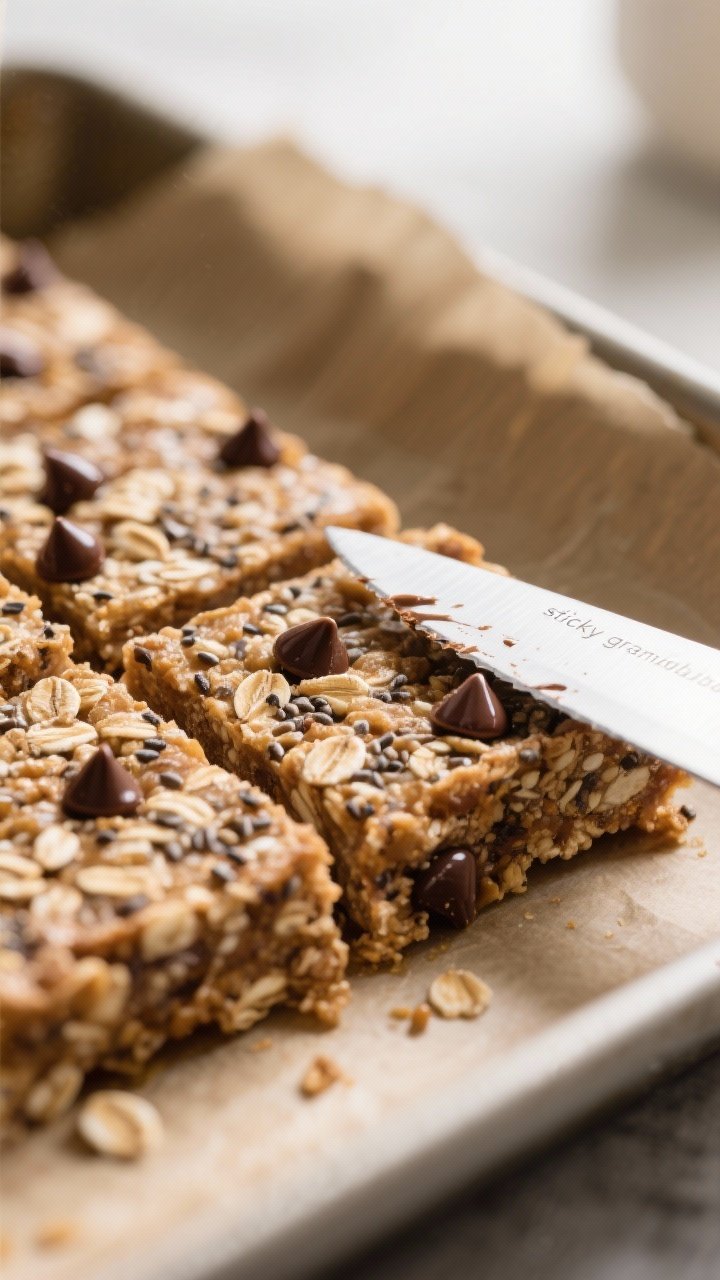
- Press without the mess. Transfer to the lined pan. Use a second sheet of parchment or the back of a measuring cup to press firmly into an even layer, all the way to the edges. Compacting is key for clean slices.
- Chill to set. Refrigerate for 60–90 minutes, or freeze for 25–30 minutes.
You’re setting the structure so it slices like a pro.
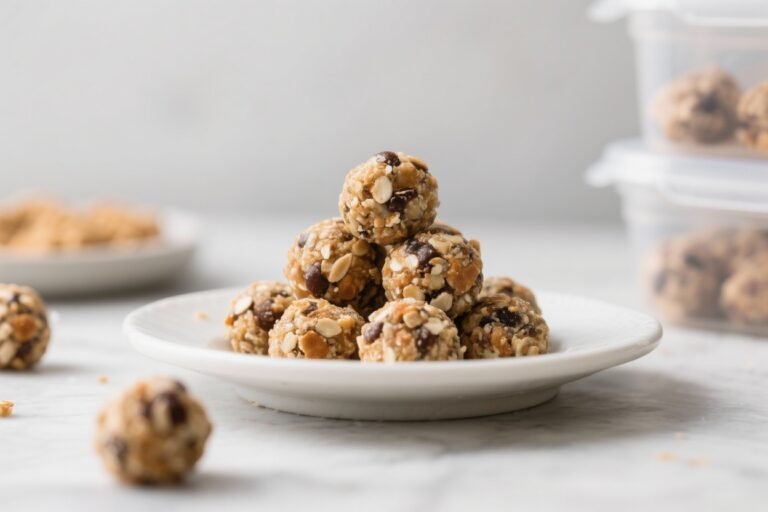
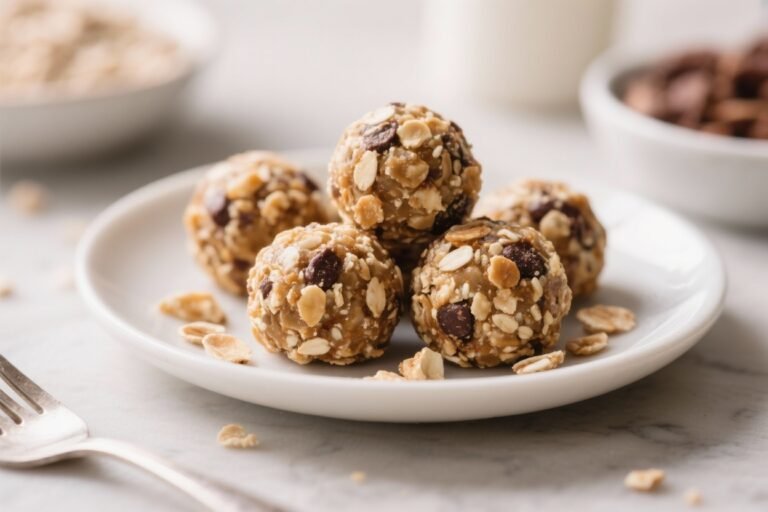
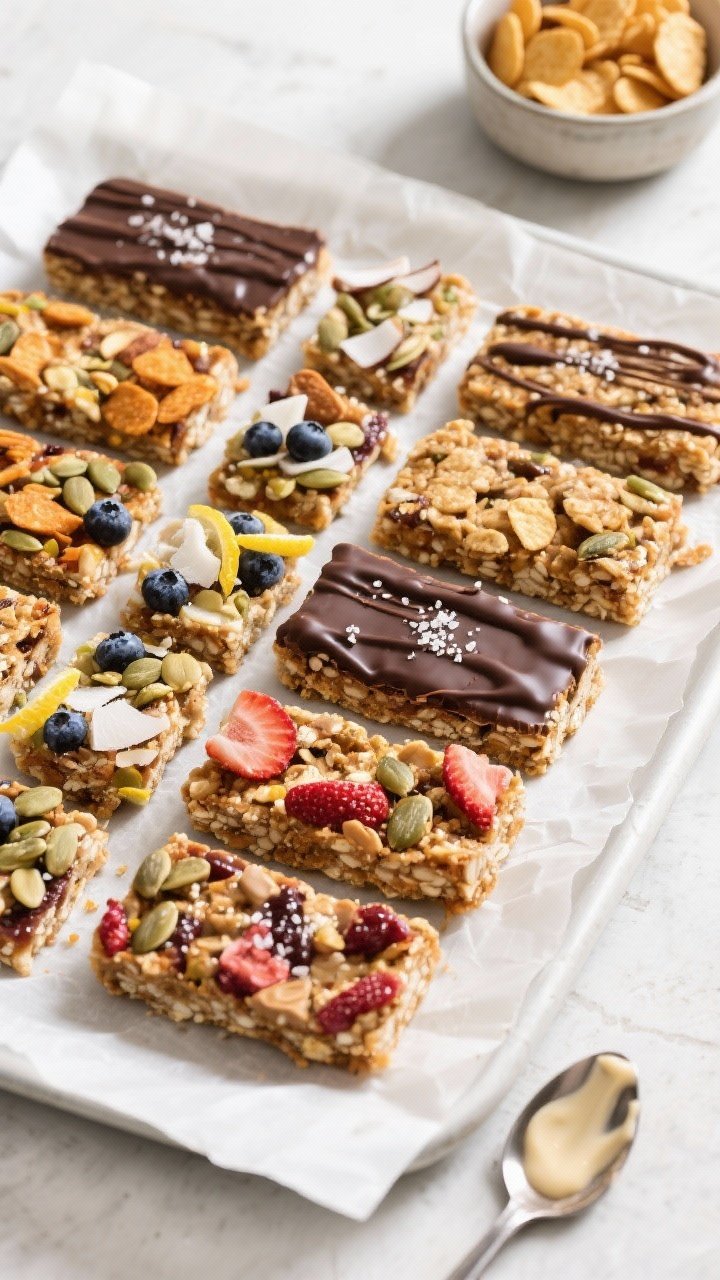
- Lift and slice. Use the parchment overhang to lift out. Slice into 16–24 squares or bars with a sharp knife. Wipe the blade between cuts for bakery-level edges (if you’re fancy like that).
- Portion and store. Wrap individually or layer with parchment in a container.
Then pretend you’re the CEO of Snacks, because you are.
Storage Tips
- Fridge: Store in an airtight container for up to 10 days. They actually get better after day one—denser and chewier.
- Freezer: Freeze up to 3 months. Thaw 10–15 minutes at room temp or eat straight from the freezer if you like a firm bite.
- On-the-go: Wrap bars in parchment or reusable wraps.
They’ll hold at room temp for 4–6 hours without falling apart.
What’s Great About This
- Zero rolling, zero stickiness. The press-and-slice method keeps your hands clean and your sanity intact.
- Macro-friendly. Easy to hit your protein and fiber goals without gnawing on cardboard.
- Kid-approved. Sweet, chewy, and customizable. Also lunchbox-friendly, especially with seed butter.
- Prep once, snack all week. A 10-minute session yields a dozen-plus squares. ROI your time like a boss.
Don’t Make These Errors
- Skipping the parchment. This is how you end up chiseling bars out of a pan like an archeologist.
Don’t.
- Not pressing firmly. Loose packing equals crumbly bars. Use a flat-bottomed cup and go corner to corner.
- Overloading wet ingredients. Too much syrup or milk = sticky chaos. Add liquids gradually until it just holds.
- Cutting before chilling. Patience pays.
Warm mix = ragged edges and broken squares.
- Using quick oats only. They can make the mix pasty. Rolled oats provide structure and chew. If using some quick oats, blend 50/50.
Recipe Variations
- PB&J Crunch: Peanut butter base + chopped peanuts + dried strawberries.
Add a pinch of cinnamon.
- Mocha Chip: Add 1 tablespoon instant espresso and use dark chocolate chips. Vanilla protein optional but recommended.
- Trail Mix Deluxe: Almond butter + pumpkin seeds + raisins + coconut flakes + a drizzle of melted chocolate on top.
- Nut-Free School Safe: Sunflower seed butter + mini chocolate chips + hemp hearts. Use maple syrup.
- Lemon Blueberry: Add 1 teaspoon lemon zest + 1/2 cup dried blueberries + a pinch of extra salt.
Swap vanilla for almond extract if you’re bold.
- Apple Pie: Add 1 teaspoon cinnamon, 1/4 teaspoon nutmeg, and 1/2 cup finely chopped dried apples.
- High-Protein Boost: Increase protein powder to 3/4 cup and add 1–2 extra tablespoons milk until it binds.
FAQ
Can I make these without protein powder?
Yes. Just skip it and add 1/4 cup extra oats to compensate. You may need 1 tablespoon less milk; adjust until the mixture presses together cleanly.
How do I keep the chocolate chips from melting?
Use room-temperature ingredients and chill the mixture for 5 minutes before stirring in the chips.
Also, press the mix with parchment, not warm hands.
Are these gluten-free?
They can be. Use certified gluten-free rolled oats and verify your mix-ins are GF. Everything else is naturally gluten-free.
What if my mixture is too dry or crumbly?
Add milk 1 tablespoon at a time and mix thoroughly.
If it still won’t hold, add 1–2 tablespoons extra nut/seed butter. It should clump when squeezed.
What if my mixture is sticky and won’t set?
Stir in more oats or a tablespoon of ground flax to tighten it up. Then press firmly and extend the chill time by 20 minutes.
Can I bake these?
You don’t need to, but if you prefer a bar texture, bake at 325°F (163°C) for 10–12 minutes, cool completely, then slice.
The flavor gets toastier.
How many does this make?
In an 8×8 pan, you’ll get 16 squares or 12 larger bars. For bite-sized pieces, cut 25 mini squares. FYI: smaller cuts = better portion control (in theory).
Can I use steel-cut oats?
Not recommended.
They stay too hard. If you must tweak, pulse rolled oats in a food processor for a softer texture—don’t go full flour.
Are they kid- and allergy-friendly?
Yes, with swaps. Use sunflower seed butter and omit nuts.
Always check school policies and ingredient labels for cross-contact.
How do I add more fiber?
Increase chia or ground flax by 1 tablespoon each and mix in unsweetened coconut or hemp hearts. Then bump milk slightly to maintain cohesion.
In Conclusion
These Mess-Free Energy Bites (No Rolling Required) deliver snack-time dominance without sticky hands or kitchen chaos. Press, chill, slice, and you’ve got portable fuel that actually tastes like a treat.
Customize the mix, stash a batch, and watch your snack game upgrade overnight. Minimal effort, maximum payoff—exactly how weekday eating should be, IMO.
Printable Recipe Card
Want just the essential recipe details without scrolling through the article? Get our printable recipe card with just the ingredients and instructions.